The chocolate used in this cake is fairly important. Dutch processed chocolate has a different alkalinity than unprocessed chocolate and cacao powder, so these ingredients cannot be easily interchanged in this recipe. Use a high quality eating chocolate (such as Dagoba) and pure cacao powder.
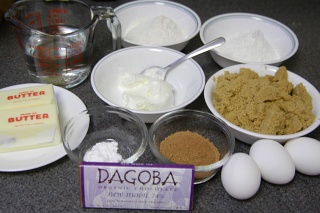 Assemble the ingredients for the batter: 8 oz. (225 g) unsalted butter (softened), 1-1/4 cups (295 g) drinking water, 3/4 cup (105 g) all-purpose flour, 3/4 cup (85 g) cake flour, 1-1/2 cup (300 g) dark brown sugar, 3 large eggs, 1/4 cup (20 g) pure cacao powder, 2 oz. (55 g) 70% cacao dark chocolate, 1-1/4 tsp. baking soda, 1/4 tsp. table salt, 1/2 cup (115 g) sour cream, and 1 tsp. (5 mL) pure vanilla extract.
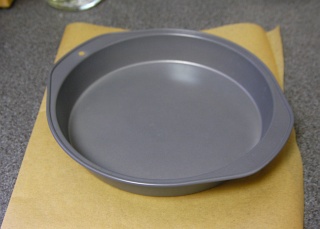 We'll also need two 9-in. round cake pans (or 3 8-in. round cake pans for a taller three-layer cake) and two sheets of parchment paper. Place a cake pan over each sheet of parchment paper. Using a pencil, trace a circle around the base of the cake pan.
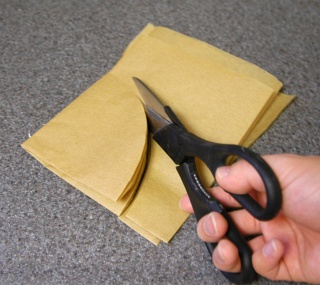 Fold the parchment paper in half so that the circle forms a half circle. Then fold in half again to form a 90° arc. Cut along this curve to form circles of parchment paper.
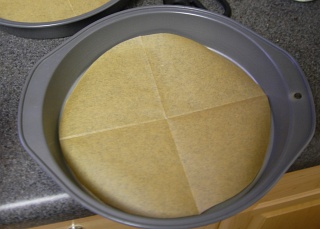 The paper should fit perfectly into the bottoms of each cake pan. Using this folding and cutting technique is a bit simpler than attempting to neatly cut and entire circle.
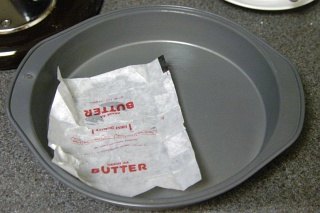 Grease the bottom and sides of each cake pan with the wrappers from the unsalted butter. (You can do this step now or after you cream the butter - whatever is convenient.)
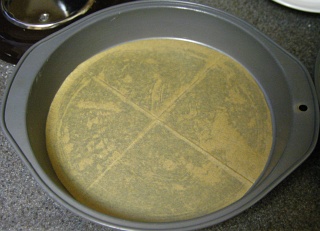 Line the bottom of each pan with the circles of parchment paper.
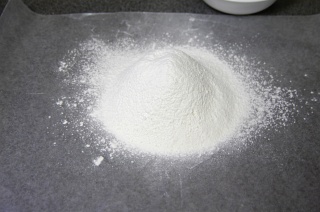 Start by sifting the two flours, baking soda, and salt together. I like to sift them onto a sheet of wax or parchment paper because the paper can then be picked up and the contents poured out in an easy to control manner.
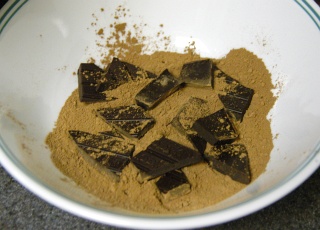 Break up the chocolate into 1/2-inch (1 to 1.5 cm) squares and combine with the cacao powder.
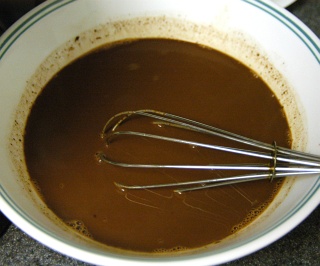 Bring the water to a boil and measure out 1-1/4 cup. Pour over the chocolate and whisk gently until the chocolate has completely dissolved. Using water heightens the chocolate flavor of the mixture. (Try tasting chocolate melted in warm milk and compare it to the taste of chocolate melted in water. The milk based hot chocolate will feel thicker and richer, but the water based hot chocolate will have a surprisingly strong chcolate flavor.)
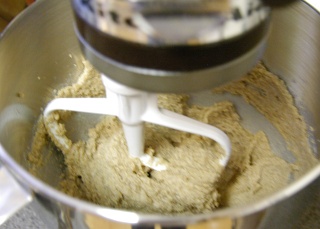 Once the flour has been sifted and the chocolate melted into boiling water, cream the unsalted butter with a standing mixer equipped with a flat beater. Add the dark brown sugar and mix until butter and sugar are evenly mixed. Scrape down the bowl with a spatula.
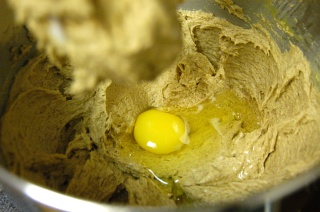 One at a time, add the eggs and beat on medium-high until fully incorporated.
Related Articles
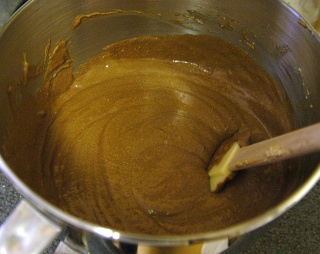 On low speed, mix in a third of the flour mixture followed by half of the chocolate liquid. Repeat with another third of the flour and the rest of the chocolate. Finally, mix in the last third of the flour. Stop the mixer once the batter has just combined.
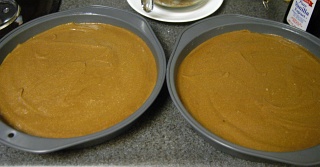 Pour the batter into each cake pan as evenly as possible. (For my readers who love to be as precise as possible, the fastest way to split the batter evenly is to tare the weight of a cake pan on a digital scale and alternate pouring between two pans while massing them in turn. In about thirty seconds, you can evenly split the batter with as little as 1% error.)
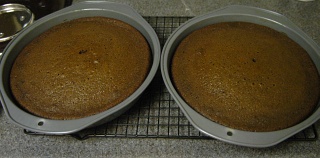 Bake both cake pans in a 350°F (175°C) oven on a rack set to the center position for 25 minutes or until a toothpick or wood skewer thrust into the center of the cake and withdrawn is clean or only has dry crumbs attached. Remove both pans from the oven and allow them to site on a wire rack for five minutes.
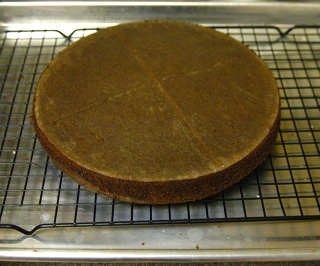 Run a knife along the circumference of each round to release the cake from the pan. Invert the pan over a wire rack. The cake should gently release and rest on the rack.
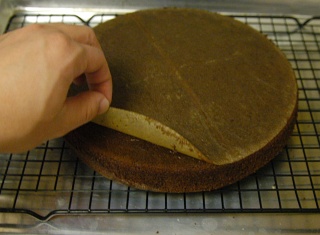 Immediately remove the parchment paper from the bottom of the cake. Waiting until the cake begins to cool may result in some of the cake surface sticking to the paper and lifting off as you remove the paper.
Allow the cake rounds to cool completely. Meanwhile, prepare a batch of heavy frosting such as a buttercream to frost the cake.
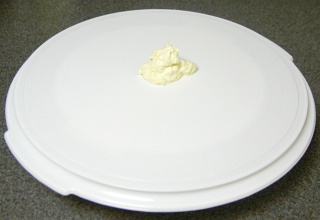 Once the cake layers have fully cooled, apply a little frosting to the middle of a cake cardboard, plate, or whatever surface you plan on constructing your cake. In these pictures, I built my cake directly onto a cake keeper.
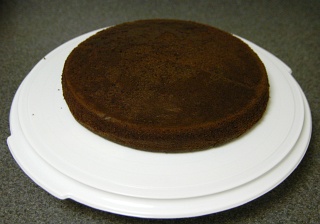 Place one of the cake layers onto the dollop of frosting. The frosting acts as mortar - keeping the cake from moving while we work with it. I like to place the layer topside down. This is because the bottom of the cake layer will be facing up and the next layer of cake will be placed bottom side down. Since I use two identical cake pans, the dimensions of the bottoms of the cakes will always match. If the cake layers are not relatively flat, you can use a long serrated knife (like a bread knife) to cut any excess cake that might form a dome. Perform any cutting on the topside (the side resting on the wire rack).
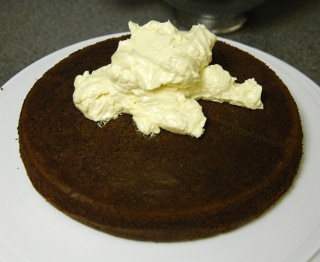 Place a sizable quantity of frosting onto the top of the cake layer (exact quantity will vary, but make sure you use less than half of your total frosting).
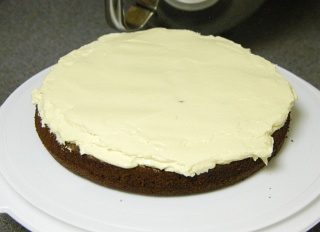 Using an icing spatula or offset spatula, spread the frosting so it forms a flat layer. I find this easiest by holding the spatula so the edge is held at a 45° angle to the surface of the cake and the frosting is pushed out from the middle of the cake. I keep pushing the frosting out and rotating the platform that the cake is sitting on.
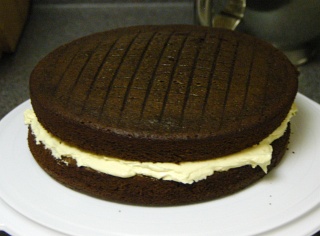 Lay the second layer of cake onto the leveled frosting. Be sure to match the face of the cakes (bottom down if the first cake layer was placed top down) so the diameters will match.
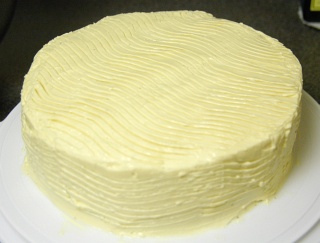 Apply frosting evenly to the sides of the cake. Use the rest of the frosting to cover the top of the cake. At this point you can practice the art of cake decoration - of which I am not well practiced.
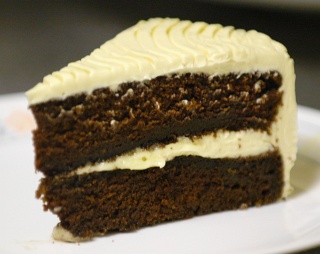 Despite the amateur appearance of the cake, the flavor of this cake can only be described as really chocolatey without any bitterness. The texture is halfway between crumbly and moist - dense but not heavy.
Chocolate Cake (serves 12)
| Butter and line two 9-in. round cake pans | ||||||||||||
| Preheat oven to 350°F (175°C) | ||||||||||||
| 8 oz. (225 g) unsalted butter, softened | cream | cream | beat in 1 egg at a time | beat on medium speed for 10 sec. and scrape | mix in flour and chocolate on low speed until just combined (1/3 flour, 1/2 chocolate, 1/3 flour, 1/2 chocolate, 1/3 flour) | divide evenly into two 9-in round cake pans or three 8-in. round cake pans | smooth batter to edges of pans | bake 350°F (175°C) for 25 min. | cool 5 min., run knife around perimeter, invert onto wire rack and cool completely | assemble and frost | ||
| 1-1/2 cup (300 g) dark brown sugar | ||||||||||||
| 3 large (150 g) eggs | ||||||||||||
| 1/2 cup (115 g) sour cream | ||||||||||||
| 1 tsp. (5 mL) pure vanilla extract | ||||||||||||
| 2 oz. (55 g) 70% cacao dark chocolate | combine | whisk until smooth | ||||||||||
| 1/4 cup (20 g) pure cacao powder | ||||||||||||
| 1-1/4 cup (295 mL) water | boil | |||||||||||
| 3/4 cup (105 g) all-purpose flour | sift | |||||||||||
| 3/4 cup (85 g) cake flour | ||||||||||||
| 1-1/4 tsp. (5.75 g) baking soda | ||||||||||||
| 1/4 tsp. (1.5 g) table salt | ||||||||||||
Related Articles

Brown sugar should always be packed when measuring by volume. (Just take a dry measuring cup and fill it with brown sugar, then push down on it with the back of a spoon to squeeze as much air out as possible and keep adding brown sugar in this manner until the surface is level with the dry measuring cup.) Alternatively, you can simply measure by mass. 1 cup packed brown sugar is 200 g.
When using dry ingredients, I typically use an electronic scale unless the volume of the ingredient is a tablespoon or less. This left the sugar loose (as shown in the picture). It also seems to integrate faster into the butter when loose than when packed, but after those few additional seconds it takes for the stand mixer to break the packed sugar apart does not make a difference to the recipe.
Don't worry about seizing. We're melting chocolate into the water (where water is the dominant ingredient). There is so much water in this recipe that the chocolate components (cocoa, sugar, fat) will be suspended in the boiled water.
Seizing is an issue when moisture is introduced to chocolate that we're melting that we want to keep as solid chocolate later. It occurs because chocolate very dry (almost no water content) and the cocoa and sugar particles will have a strong affinity for any water that is introduced. When melting chocolate (for chocolate and confection making), if a tiny amount of water is introduced, entire portions of the chocolate will solidify as the cocoa and sugar mass clumps together (out of the fat). Seized chocolate can no longer be used for chocolate making, but can still be used for baking applications such as this cake.
The first mention of the round cake pans in the article is a link to amazon.com where they can be purchased for about $4 each.
The wavy pattern was achieved using a fork.
B)
I felt that with cake flour only, the texture was not as good (for a chocolate cake) as with the mix. All all-purpose flour felt a bit too heavy/dense for me.
Suanne
http://chowtimes.com
Back to the cake, instead of using your buttercream frosting, I used my favorite frosting for chocolate cakes. Now, I almost always make a sheet cake because it's just easier to make and to transport. I leave it in the pan too and this frosting is rather liquid at first and everyone likes that it oozes down the edges and into the corners of the cake. So, here's the recipe:
1/2 c butter
5 T of dark cocoa....use the Dutch Processed dark kind and use sort of heaping tablespoons instead of leveled ones
6 T buttermilk
1 T vanilla...use the Mexican kind...La Vencedora...it is the best
about 1 pound of powdered sugar
1/2 c chopped pecans
In a medium saucepan, melt the butter with the cocoa and the buttermilk. When melted, remove from the heat and add the vanilla and then start mixing in the powdered sugar. I used a little more than half of a 32 ounce bag last night. You want it to be oozy and liquidy as it will set up once it is refrigerated. When the sugar is mixed in well, add the pecans and pour it over your cake. Great stuff.
My chocoholic family loved it on top of this dark, dark cake
Love your web site and recipes, Michael! Keep up the great work!
Yes, that would work fine.
Greetings
Doug Alder
http://www.thealders.net/wkpowercook/
The main reason I appreciate the dual measurements is that though I'm from America, I am living in China at the moment - and some things come with the grams marked right on the box (for instance, 125g and 227g butter - why not 225 or 250? I don't know...) I've found everything on the recipe with a few minor substitutions ('yoghurt' for sour cream, a dark chocolate bar for the chocolate), but I do not have parchment paper. I'm going to attempt it without - perhaps one layer with just greased, another with grease and flour, to compare - but for future reference, is there any decent substitute or any way to treat some other paper to make it serve the purpose? (I can't get brown paper bags here either for my favorite merengues to bake on, and sadly I've found that plain printer paper leaves a nasty taste) I do have aluminum foil - expensive!!! - but haven't yet come across any waxed or parchment paper.
Also wondering if there's anything to do to keep the batter fresh between layers. The only ovens available here are toaster ovens, so I'll be baking my three layers one at a time.
One last note: in the text it says to let the cake cool 5 minutes, but in the recipe at the bottom is says 15. I'm gonna guess 5 is right?
Thanks!
"Miss Jubilee"
They mark it 227 g because it was first measured in ounces (8 ounces) and then the value was converted to g and printed on the label. Usually, when an item is measured in g and then converted to ounces it is rounded to the nearest 1/4 ounce - so the 125 g package (if it had labeling in ounces) would probably have read 4-1/2 ounces.
Your best bet would be to grease the pan and sprinkle either flour (like you said) or chocolate powder (which would be best for this recipe because of the color) into the pan and get it to coat all the sides. Remember to knock out the excess powder.
A sheet of plastic wrap, pressed up onto the surface of the batter should keep it from drying out.
Good catch. I've fixed the typo.
I have a suggestion for this. It is something I usually use to speed things up. Instead of using 2 separate pans (or more) you can put everything in a deeper one. After it is baked and cooled enough you can cut it into as many layers as you need. You can use a knife of course, but I prefer a peace of thin thread (floss), it is more precise. Also, if you are not practised in this, for better precision it is better to move the cake than the thread. Tie one end of a thread to a needed height, take other end in your hand, tighten it up, don't move it and push the cake forward with your free hand.
You may think that cake won't be baked well in the middle cause of the thickness, but don't worry. At least, I didn't have problems with that... yet :) .
p.s.
This is than the fastest way to measure it ;)
And, one more way to divide it - I used my one-cup measure and just scooped the batter into the pan and into two smaller bowls to divide it into three (since I didn't know how much to put in the pan for the first layer). But then I had to eyeball it with a spoon for what was left over, so it's not nearly as exact as weighing. But I like that floss idea!
I also wrote up my cooking experience on my own blog at http://missjubilee.spaces.msn.com/ if anyone would like to read it :)
I was very pleased with the parchment paper technique and utilizing the butter wrappers to grease the pans (genius!). My cake was extremely moist (which was a good thing) but when I went to invert the cake in order to frost it after allowing it to cool, it fell apart and I had to piece it together. Should I have allowed it cool longer?
I didn't care for the buttercream frosting-almost too buttery of a taste but I will make this cake again with different frosting as it was delicious, moist and full of chocolate flavor.
Thanks for the recipe--I love your site!
Thanks.
You can make a cake with only 2 ingredients: cake mix and a 20 oz. bottle of diet soda! Just mix them together and bake! That's it!
Of course, you need to coordinate colors (white cake = diet sprite/7up, etc.). I don't know why it has to be DIET, but I think it has to be.
I bet that'll be an easy recipe to post!
thanks
cakelover
Where do you live? Dagoba Chocolate can be ordered directly from Dagoba at http://www.dagobachocolate.com. You can also find them at Whole Foods if you have one close to where you live.
This is possible. I would replace the baking soda with about 2 teaspoons of baking powder though. Otherwise, the ingredients could work for a white/yellow cake.
You can use all-purpose flour, but cake flour will help make the texture crumbly (like a cake) while all-purpose will tend the cake to be closer to a muffin consistency.
Where can I find the pure cacao powder?
What are some other types of chocolate that can be used that are easier to find (or cheaper) than the Dagoba?
Thanks!
Cacao powder can generally be found in the baking aisle of your supermarket. Some brands market it as cacao powder while others use the term cocoa powder. Usually the companies that sell it as cacao powder do so to emphasize that no unnecessary ingredients have been added (such as sweeteners).
Scharffen Berger, Schokinag, and Valrhona all make excellent cocoa/cacao powders. Depending on the area you are in, it may be easier to find Ghiradelli or Guitard cocoa which is also very good. If all else fails, there's always Hershey.
And a similar question: when making 7-minute frosting, most recipes call for adding 2 Tbsp or so of COLD water. Again, I would really like to know the rationale behind this as the sugar/egg/syrup/water mixture is going to be mixed in a double boiler anyway...
It would be great is some science whiz could answer my questions! :)) This is a very informative site, btw!
It also made me realise I don't like proper Buttercream Frosting. You may as well as unpeel a stick of butter and eat it like a banana!
Also, your gram weight of sour cream in the intro is for a whole cup, I caught it when I was assembling becuase the correct weight is listed in the table, but I had gotten out the full amount, and had to re-measure before dumping it in.
I ended up making cupcakes with an Italian buttercream instead of the american one listed because they were for a potluck and I wanted stability at room temp. They were a hit.
Thanks! I fixed it.
It calls to add the sour cream and the vanilla extraxt about half way down, but I don't see how much vanilla extract to use. You're recipe seems so precise and I don't want to mess it up! (Or am I blind and just didn't see where it was?)
Thanks, I can't wait to make it!!
It calls to add the sour cream and the vanilla extraxt about half way down, but I don't see how much vanilla extract to use. You're recipe seems so precise and I don't want to mess it up! (Or am I blind and just didn't see where it was?)
Thanks, I can't wait to make it!!
1 tsp. Sorry about that, it's listed in the recipe summary table at the bottom, but not in the exposition. I'll add it somewhere now.
Sometimes I need a bigger cake though to feed more mouths, could I bake this in a 9" by 12" pan and if so for how long? Or do you have any other suggestions? You're help is much appreciated (and so are your recipes!)
Yes, 70% cocoa or cacao content is what you're looking for. Dagoba carries a several varieties of chocolate ranging from 68% to 74% in blended and single origin. Any of these will be fine (and will have different flavors depending on which origin you select).
As a side note - the baking time for standard sized cupcakes is almost exactly 15 minutes at 350F (tins filled 3/4 full did not rise as much as I wanted, so I went ahead and filled them all the way to much success).
Also, I turned my cakes into German Chocolate cake using this disgustingly good recipe for coconut pecan frosting. Don't even bother looking if you're counting calories.
1 cup sugar
3 egg yolks
1 stick butter (.25lbs)
1tbsp vanilla
1 can condensed milk
pinch of salt
1 can coconut
1/2 cup (chopped) pecans
1tsp cornstarch
throw the sugar, butter, vanilla, eggs, condensed milk, salt and cornstarch into a saucepan and stir constantly over medium heat for about 5 minutes or until everything is melted together and looking smooth. turn the heat up to med-high and stir constantly until flakes of brown begin to appear as the sugar caramelizes along the bottom of the pan. I haven't burned it yet, just keep stirring and pay attention. When you have a pretty brown tinge to the whole mix, turn off the heat, throw in the coconut and pecans, stir it up a bit more and pour warm over your cake or cupcakes. yum!
Emily
South Carolina
cake flour = self raising flour, why do you need sour cream? Another question what is buttermilk in other recipe?
flours are classified by their protein aka gluten content.
soft to hard.
soft is low gluten - this is the "cake flour" type - you don't want a lot of (toughing) gluten developing in yer cakes....
hard aka "bread" flour has higher gluten - gluten makes for an elastic dough that holds the bubbles that the yeast burps out.
self rising is two turns unrelated to any of the above; although it is typically "all purpose." self-rising contains pre-mixed leavening - usually baking powder - and a dash of salt.
why do you need sour cream? well, baking powder and baking soda are both base compounds. mixed with acids - sour cream, buttermilk, and a ton of "others" - that combination produces a chemical reaction which releases co2 which makes for bubbles which get labeled "leavening"
yes, yes, either. <g> watch the batter consistency - it may be slightly looser - you may need a bit more flour and/or bake time adjustments.
keep in mind, when you alter a baking recipe, you will probably get slightly different results. some people take their chocolate cake real serious! and a little or this or that is used to modify consistency, crumb, moistness, etc.
pls do reply. and pls give clear instructions.
awaiting your reply
kalpana
if you could give the make and model number, we might be able to look it up and provide more informative answers, but:
the oven has at least two modes of operation:
microwave - I have never attempted to microwave cook a cake. there are microwave recipes for chocolate cake on the web - but I suspect the ingredients are different to accommodate the microwave method.
grill: grilling a cake is not something I would recommend.
convection: does the oven have the ability to set a baking temperature?
not grilling, just "hot" ? a convection oven uses a fan to circulate the air inside the oven; typically this means foods cook faster. "standard" recommendation is to reduce the oven temp by 25F' (i.e. 162'C vs 177'C)
and check on the cake more frequently for doneness - don't just go by the clock.
"The convection mode enables you to cook food in the same way as in a traditional oven...."
so, select the convection mode, set the temperature, bake the cake - seems simple enough, no?
The writer of this recipe just wants to say that this recipe doesn't work in a microwave oven... you're better off with Dilbert's advice :)
I tried your cheesecake recipe, and it's heavenly good. Tonight, I will bring it over for my mother-in-law. Thank you so much for the detail recipe.
I have a question. If I am only using an thick 8 inches pan to bake the chocolate cake (usually bake with sponge cake), do you think i have to bake a longer? like an hour or more?
Cheyenne
Try with raspberries on the top and around the base for a great compliment.
will try your recipe, it looks delicious!! :-)
I also decide on my top cake (the flatter of the two!) and spread what will be its inside (lower) side with a tart jam like apricot - not wholefruit, just nicely spreadable to a uniform depth. Then I spread the upper layer of my bottom cake with butter icing, sandwich them together and put the rest of the butter icing on top.
Everyone I know enjoys this method.
So I would recommend trying this recipe with dutched cocoa and see which type you prefer. You need not be cautious about it.