Ice crystal formation is the number one cause of poor texture in ice creams. Water in the ice cream mixture freezes into ice which causes a crumbly and unpalatable texture. In the worst case, it can be icy and grainy. The quest for the best ice cream recipe often revolves around trying to get the correct texture and consistency to the ice cream. Dissolving more sugar into the mixture lowers the freezing point of water, but can also make the ice cream too sweet and possibly soupy (sometimes even gritty if the sugar begins to crystalize). The use of binders like guar gum and carageenan, if not carefully controlled, can result in a goopy consistency and odd mouthfeel (and isn't always available to home cooks). Egg yolks are also used to bind water to fat, but the number of yolks needed to provide enough lecithin and other proteins to effectively bind all the water in milk and cream often results in an ice cream that has an overwhelming eggy flavor. Jeni's Splended Ice Creams at Home uses a few novel techniques to make the creamiest and smoothest ice creams around. First, she relies on casein and whey proteins instead of eggs to bind most of the water in the ice cream. By boiling the milk and cream, the milk proteins begin to denature and bind readily to the water (and evaporates some of the water as well). A dollop of cream cheese, which is rich in casein, is whisked into the mixture to provide additional milk proteins. As extra insurance, a slurry of tapioca starch is added to the ice cream base to capture any unbound water into a starch matrix. The inclusion of a little bit of tapioca syrup (which is an invert sugar high in glucose) helps prevent the sugar from forming crystals. All of this serves to make a homemade ice cream of unsurpassed quality, texture, and consistency.
Related Articles
The day before making this recipe, freeze the cannister from your ice cream maker. (This is, of course, assuming your ice cream maker is the type with a cannister or bowl to be frozen. Otherwise, you'll have to read the instructions on your ice cream maker and adjust the instructions for spinning the ice cream accordingly.) Prepare honey pecan pralines an hour or two in advance and set aside 3/4 cup for use with this recipe. (You can use more or less pralines depending on if you like a lot or a little in your ice cream. I suggest 3/4 cup as a starting point.)
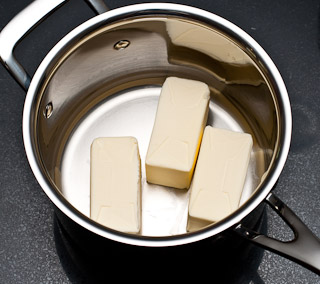 Start by melting 3/4 pound (340 g) unsalted butter in a pot over medium heat. This might look like a lot of butter, but we won't be using most of it. We'll be collecting the milk solids for the butter to flavor the ice cream while the rest of the butter will be stored for use in the kitchen as clarified butter.
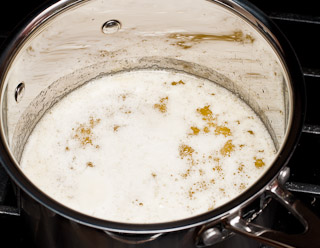 Once the butter has melted, it should begin to foam. Continue to cook over medium heat until the foam subsides.
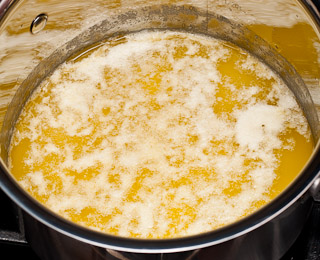 Allow the butter to sit until cooled and milk solids settle to the bottom. Some milk solids will also be floating on top - don't worry about that.
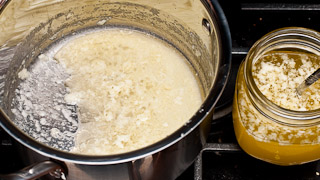 Pour the liquid butter into another container without pouring any of the milk solids from the bottom of the pot into the clarified butter container. Use a spoon to remove as much liquid butter as possible from the pot. There will be a little clarified butter left in the pot that you can't remove without removing milk solids. (If some milk solids are floating on the clarified butter, you can scrape it off after refrigerating the clarified butter.) There will be about 2 tablespoons of milk solids harvested from the 3/4 pound of melted butter. (Here at Cooking For Engineers, we have another way to collect milk solids and produce clarified butter. Use which ever method works best for you.)
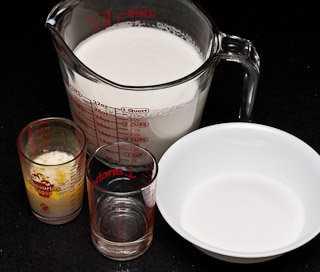 The ingredients we'll need to make the ice cream are 15 oz (445 mL / 460 g) whole milk, 10 oz (295 mL / 300 g) heavy cream, 2/3 cup (133 g) sugar, 2 tablespoons (30 mL / 44 g) tapioca syrup (or light corn syrup if tapioca syrup is unavailable), and the milk solids. I list the masses of each of these ingredients because when I make this recipe at home, I just place the pot with the milk solids on a scale and measure all the ingredients directly into the pot. This saves the hassle of dirtying a bunch of measuring cups and bowls. Also, getting light corn syrup out of a measuring cup is a pain. Measuring it directly into the cooking vessel is much faster and easier.
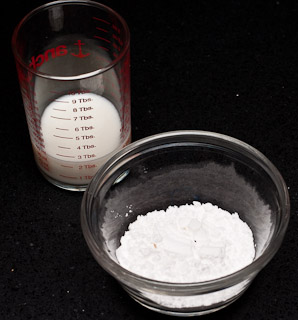 For the starch slurry, measure 1 ounce (30mL / 30 g) whole milk and 4 teaspoons (11 g) tapioca starch (or corn starch if tapioca starch is unavailable).
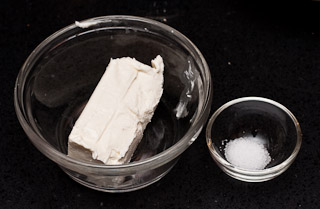 We'll also need 3 tablespoons (42 g) cream cheese and 1/8 teaspoon (0.75 g) table salt.
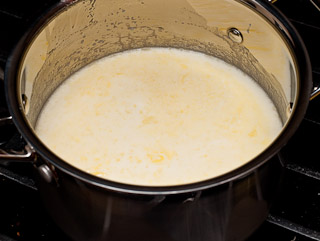 Combine the milk solids, 15 ounces of milk, cream, sugar, and syrup into a pot (3 quarts or larger to contain any foaming) and bring to a boil over medium heat.
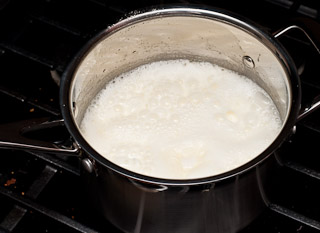 Allow the mixture to boil for four minutes. Keep an eye on the level of the foam if you are using a pot smaller than 4 quarts and adjust the heat to prevent boil over. Boiling the mixture helps reduce the water content in the ice cream base through evaporation and to denature the proteins in the milk and cream. These proteins will bind with the water in the ice cream base and help prevent ice crystals.
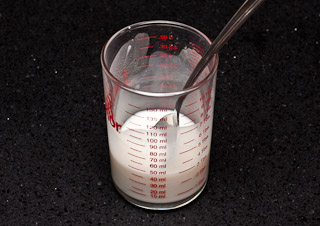 Prepare a slurry by mixing the tapioca starch with 2 tablespoons of milk. Mix well and make sure no clumps of starch are left in the milk or on the spoon.
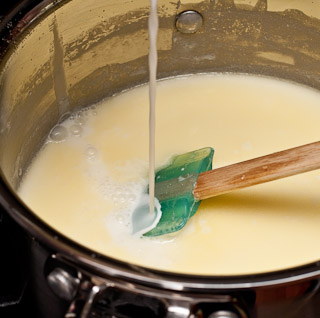 Remove the pot from the heat and pour in the tapioca starch slurry while stirring with a heat resistant spatula.
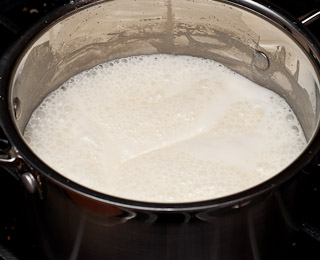 Bring the mixture back to a boil and boil for one minute while stirring with the spatula. Remove the mixture from the heat source.
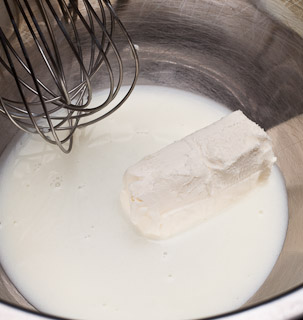 In a medium mixing bowl, place the softened cream cheese, salt, and a small amount of the hot cream mixture (anywhere from one to four tablespoons will work).
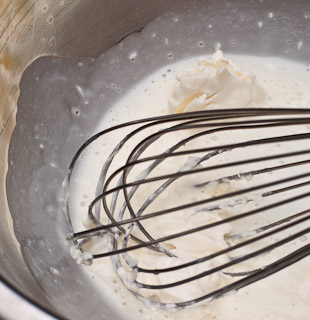 Use a whisk to blend the cream cheese into the mixture.
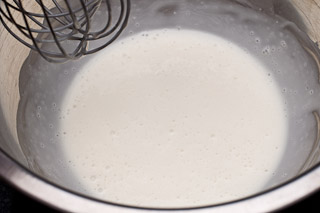 Continue whisking until there are no lumps of cream cheese remaining and you have a thick uniform liquid. Pour the rest of the mixture into the bowl and whisk until uniformly blended.
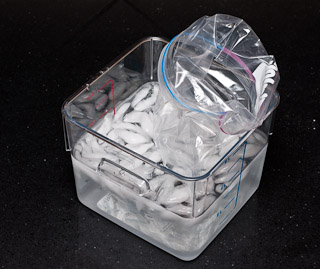 Prepare an ice bath with either a large bowl or container. I use about three to four quarts of ice water. Open a gallon sized Ziploc freezer bag and place it into the water bath.
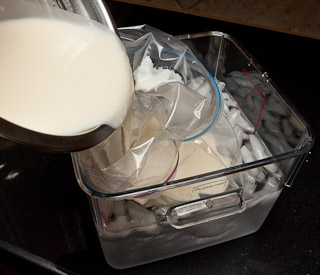 Carefully, pour the mixture into the bag. The bag will float on top of the water, but, as you pour the mixture in, it will sink into the ice bath. (I took this photo with my right hand while pouring with the left and trusting the container and Ziploc bag to behave and self-balance. I recommend holding the bag with one hand and pouring with the other to minimize the risk of any accidents. Folding the opening of the bag over like I did in the photos also helps keep the bag open while you pour.)
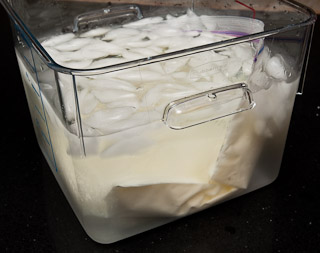 Try to work out as much air as possible from the Ziploc bag before sealing it. Submerge and flatten the bag to maximize the surface area making contact with the ice water. This is the fastest way to conveniently chill the ice cream base. Chill the ice cream base for 30 minutes or until completely cold. If you have enough ice in your water bath, you can leave it on the counter. Otherwise, placing the bath into your refrigerator can help.
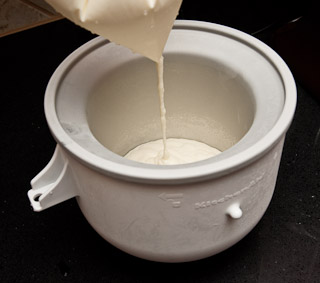 After thirty minutes or more has elapsed, remove the fully chilled bag from the water bath, wipe dry, and pour into your ice cream maker's frozen ice cream canister by snipping a corner off the bottom of the bag and allowing the contents to drain into the canister. You can help it along by squeezing the bag just as you would a pastry bag.
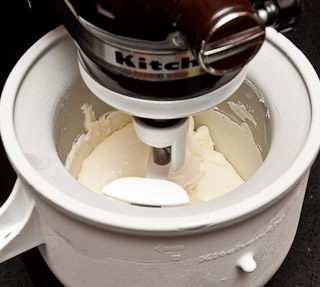 Immediately, place the scaper into the cannister and start the machine. I use an ice cream cannister with my Kitchenaid mixer, but another popular ice cream making device is the Cuisinart ice cream maker.
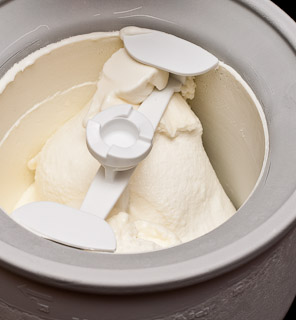 Allow the ice cream machine to spin until it looks like no more ice cream is being made. Or, in my case, the ice cream becomes so thick it won't turn anymore. (It's not necessary to get the ice cream that cold while in the machine... in fact, it only happened to me because I froze my canister at -10°F. Achieving a soft serve consistency is good enough.) Jeni's Splended Ice Creams at Home says you should spin the ice cream until your freezing bowl is no longer freezing the ice cream anymore and the ice cream pulls away from the sides. For her, this was about 25 minutes in. I have made several batches using her recipes already and haven't needed to run the machine for longer than 15 minutes (and have never had the ice cream pull away from the walls of the canister). She did her testing with a Cuisinart machine, so there might be a difference there.
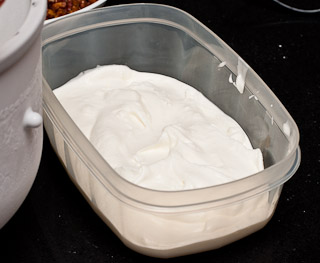 Scoop about a third of the ice cream out into a container with an airtight lid that is about 1.5 quarts or larger.
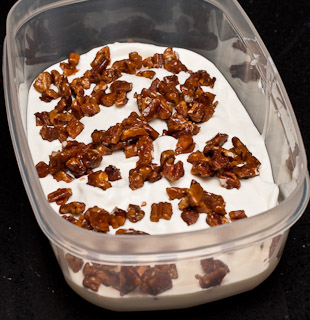 Sprinkle half the pralines over the ice cream.
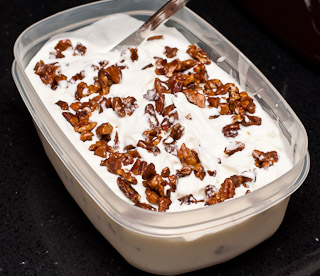 Scoop another third of the ice cream into the container followed by the rest of the pralines. Scoop the remaining ice cream into the container. The ice cream canister might still be freezing the ice cream touching the sides. If so, then the ice cream will be progressively harder to scrape out, so work quickly. You can use a dinner knife to gently cut through the pralines and ice cream mixture to even out the distribution if you wish. It's not necessary since the act of scooping the ice cream out will cut through the layers of pralines and ice cream.
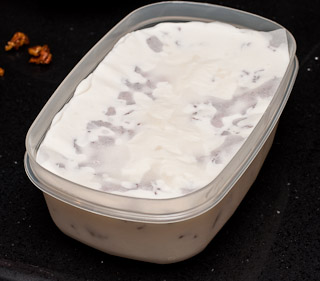 Place a trimmed sheet of parchment paper over the ice cream to minimize air contact with the ice cream as it freezes. This will also prevent any ice crystals from forming if you store the ice cream for a while. Cover and place in the coldest part of your freezer for at least four hours to completely freeze.
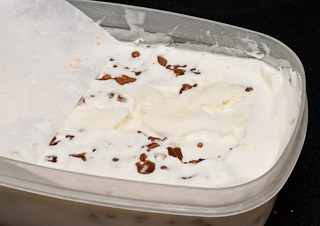 Ice cream is generally best served around 5°F (-15°C) to 10°F (-12°C), but stores best at below 0°F (-18°C). Depending on how cold you keep your freezer, you may need to take your ice cream out five to ten minutes early to allow it to warm up to scooping temperatures.
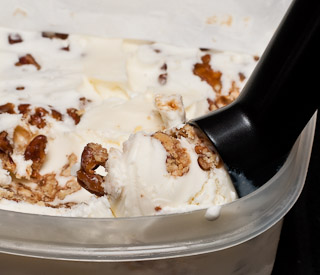 Using an ice cream scoop with antifreeze in the handle is the best way that I've found to scoop ice cream. They work a lot better than the classic ice cream disher.
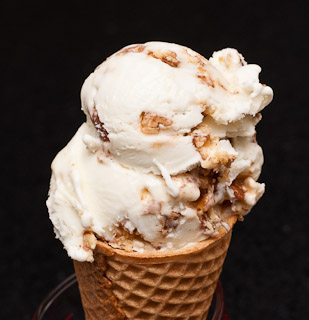 |
| Butter Pecan Ice Cream |
Butter Pecan Ice Cream (makes about 1 quart / 1 L)
| 12 oz unsalted butter | melt | pour off liquid butter and keep milk solids | mix | boil 4 min | remove from heat | whisk | boil 1 min | whisk until smooth | chill in Ziploc bag in ice bath 30 min | spin in ice cream maker | layer in container | freeze 4 hours |
| 15 oz (445 mL) whole milk | ||||||||||||
| 10 oz (295 mL) heavy cream | ||||||||||||
| 2/3 cup (133 g) sugar | ||||||||||||
| 2 Tbs (44g) tapioca syrup (or light corn syrup) | ||||||||||||
| 1 oz (30 mL) whole milk | ||||||||||||
| 4 tsp (11 g) tapioca starch | ||||||||||||
| 3 Tbs (42 g) cream cheese | ||||||||||||
| 1/8 tsp (0.75 g) salt | ||||||||||||
| 3/4 cup (200 g) honey pecan pralines | ||||||||||||
Related Articles

I found a site that said 4t of cornstarch was equivalent to 2T of arrowroot, but I'm not so sure about that this morning.
The mix is very gelatinous. After freezing in the ice cream maker, the ice cream is gooey. It pulls back when you move it, almost like dough. It tastes great, just a little bit weird in the texture. I have heard that arrowroot can get slimy with cream, but it's not slimy, just gelatinous.
I made ice cream with sugar, 10oz heavy cream and 10oz homebrew IPA a few weeks ago using 2 pinches of xanthum gum and the texture turned out really awesome. (Though the flavor was "interesting") I was worried about texture with all the water in the beer, but it wasn't a problem. Next time I try this recipe, I think I'll go the xanthum gum route.
What was the texture like after fully freezing? I'm curious to hear if it was still gelatinous or it firmed up.
You know how much I loved this ice cream when you were so kind to share. I JUST got my own ice cream maker and this is the first one I plan on making!
Thanks,
Lindsay
This recipe was not only the most delicious one I've ever made, it's still smooth as silk after spending two nights in the freezer.
I can't think of a single thing I'd change about it. I might add different flavours, but this is definitely my base recipe from now on.
Thanks so much for sharing!
Ice cream IMO should be simple: iced cream.
My favorite base mix so far is from Alton Brown and Good Eats:
2C 1/2 & 1/2
1C cream (not heavy whipping cream)
1C sugar
1 vanilla bean split & scraped (I use 2 for vanilla flavor)
(Alton suggests removing 1Tbs sugar and adding 1Tbs peach preserves but I didn't find it added much)
Combine all in a saucepan
Heat to 170F
Chill over-night and turn.
For chocolate 1/2C to 1C of cocoa powder
For coffee, add 3Tbs instant coffee
For caramel: increase sugar to 1.5C and caramelize then cool it. It will take a while to get the caramelized sugar to dissolve in to the dairy mixture.
Any fruit: macerate the fruit in sugar, add juice to dairy mix just before turning. dice fruit and add once ice cream has started to solidify
This mix is simple, reliable and tasty. The resulting ice cream is always smooth and creamy without any raw cereal tasts.
How long have I been writing Cooking For Engineers? Have I ever led you guys astray? Prior to this, I made homemade ice creams using over four or five ingredients following the traditional methods and people loved it. But, there didn't seem to be a point because there were plenty of store bought ice creams that matched or surpassed the quality of the ice cream I made at home. The only reason to make ice cream at home was for the control over ingredients and the novelty/fun aspect.
With the techniques I've laid out in this recipe from Jeni's Splendid Ice Creams at Home, the ice cream is taken to another level. The ice creams I make at home are so good in texture and mouthfeel that store bought ice creams PALE in comparison. Before, people enjoyed my homemade ice cream - now people tell other people about my ice cream and can't stop asking to have some every time they visit! Trust me, the extra steps aren't there for no reason - they actually make the ice cream better.
I would be suspicious of any "store bought" ice cream. It would most probably be too sweet, for a start, and would probably contain unacceptable additives.
I have developed my current recipes only in the last few years and am very pleased with them. There are no problems with texture or consistency or ice crystals, and I get rave reviews from the family.
I have requested Jeni's book from the library and will examine it with interest. She probably has some more exotic flavours than the ones in my current repertoire. But I doubt if I will see any need for complicated techniques.
I made Jeni's Vanilla [Ugandan Vanilla Bean Ice Cream] so that I could make a direct comparison to my own vanilla ice cream recipe. I followed Jeni's recipe as closely as possible. The main difference was that I had no vanilla bean, and used vanilla essence instead. Jeni's failed the comparison test because it had an underlying taste of boiled milk, which is not pleasant. This was what had worried me from the beginning -- bringing a milk mixture to the boil and boiling for four minutes. Maybe vanilla bean would have covered the taste -- I don't know. All Jeni's other recipes have ingredients with strong flavours that would cover the boiled-milk taste.
I then made The Buckeye State Ice Cream -- not having any idea what Buckeye State means. Its subtitle is Honeyed Peanut Ice Cream with Dark Chocolate Freckles. This was successful.
However, both these recipes were too sweet, as was the Roasted Red Cherries recipe. [Jeni puts roasted red cherriesin goat cheese ice cream. I wanted roasted red cherries to combine with my own coconut ice cream.] I had suspected this oversweetness and had reduced the sugar slightly in each recipe. In the Honeyed Peanut recipe, I even left out the honey! I added some lemon juice to the cherries to cut the sweetness. I had to do something because the cherries were very expensive. I am yet to sample that combination.
Having used Jeni's method twice, I would be very reluctant to do it again. The results are no better than mine, and are much more time-consuming and fiddly.
The recipe featured on this webpage is similarly time-consuming and fiddly. I cannot understand why anyone would bother making clarified butter to add fat to the mixture, which is only short of butterfat because of the milk. If there was all cream instead of a milk-cream mixture, the need would not arise. Cream does not need to be thickened with cornstarch, either, to turn it into ice cream.
Of about 80 recipes given in Jeni's book, many are for things not strictly ice cream -- frozen yogurts, sorbets, combinations etc. Of the actual ice creams, I have decided that I could well adapt seven to my own method. The rest either are too weird or give me a problem finding ingredients such as essential oils. The Sources page doesn't help much.
The book has major flaws in its setting out, or presentation, or whatever you like to call it. The print size for the ingredient list and method is too small, and this is inexplicable, because there is plenty of white space left on each page. The problem is compounded because of the pretentiously pale colours of the ingredient lists. I bet some "designer" did this.
Moving on now to the recommendations on this webpage: The ice cream scoop you link to has a lot of very negative reviews by users on Amazon -- enough to deter anyone.
Fair enough - glad you tried it out for yourself and came to a conclusion. I've found the ice creams to be more successful than classic recipes or the ones from my "go to" ice cream book: The Perfect Scoop in terms of texture especially after being in the deep freeze for a few weeks. I have 8 different flavors in my freezer and rarely eat ice cream so they don't get consumed quickly (only when I bring them out after hosting dinners). The texture remains outstanding where traditional five or six ingredient ice creams suffer once outside of a week or two.
The cornstarch is present to bind additional water preventing ice crystals from forming in the freezing process. This is really helpful if you don't have a second freezer that you keep at a low temperature and your primary freezer is a good temperature for serving ice creams. In addition, the cornstarch is a "safety" ingredient she adds to make the ice creams work even when the person making the ice cream isn't good at measuring things or temperatures are all over the place, etc. It's certainly not an essential ingredient, just a nifty trick.
Unfortunately, clarifying butter and using the milk solids from that is absolutely essential to providing the butter flavor in the ice cream. Using all cream instead of milk will result in a cream flavor which is quite different.
I do agree that the major downfall to her techniques is an incredibly strong cooked dairy taste in the base. The long boiling time is used to convert as much of the sugar into invert sugar (sucrose broken into fructose and glucose) as possible. Invert sugar does not form crystals when frozen. One possible way to resolve this is to dissolve the sugar into water, boil that, and then use an increased amount of cream to offset the water usage.
I do agree that it is on the border of reasonable complication. Perhaps it's better to say that people unhappy with the results they are getting from traditional ice cream making techniques should check out Jeni's Splendid Ice Cream at Home...
Wow, that's interesting. I've seen invert sugar listed as an ingredient but never knew what it was. Perhaps you could buy it commercially and use that instead? How long do you need to boil plain old sugar to result in an invert sugar solution?
You have any more thoughts on invert sugar? What if you used it in chocolate making?
Jim, check out this. http://www.chefeddy.com/2009/11/invert-sugar/
You can buy invert sugar--Amazon has it listed for about $30/gallon. But it's so easy, why not invest in a candy thermometer, make it yourself, and save some money.
Perhaps I should try making some Tollhouse Cookies with the stuff to determine the substitution ratios? :0
Jim
Technically, all syrups of glucose and fructose are invert sugar - corn syrup, tapioca syrup, golden syrup, honey, etc. The ratio of glucose and fructose differ though. The length of time varies depending on how much invert sugar you want. I unfortunately don't have any literature on the subject, but I recall that boiling for a few minutes is sufficient to convert some into invert sugar. In most recipes, crystallization of sucrose can be prevented with just a small percentage of invert sugar present to "get in the way". Boiling longer generally produces more invert sugar but I think there's a max time (after which you don't really get more invert sugar) around half an hour. Also, the addition of some acid (like vinegar or lemon juice) can speed up the process too.
That would be chocolate fudge.